heat exchanger cleaning – By Chemical, Acid, High pressure water 2.3
Article Contents
Heat Exchanger Cleaning
Heat exchangers play a vital role in various industries, from power plants and refineries to HVAC systems and manufacturing facilities. They are designed to transfer heat efficiently between two fluid streams while keeping them separate. Over time, heat exchangers can accumulate deposits, scale, corrosion, and fouling, leading to reduced efficiency and potentially costly breakdowns. To prevent these issues and ensure optimal performance, heat exchanger cleaning is essential.

Understanding Heat Exchangers
Before delving into the importance of cleaning heat exchangers, let’s briefly understand how they work. Heat exchangers are devices that facilitate the transfer of thermal energy between two fluids, often a hot fluid (like steam or heated water) and a cold fluid (such as air or cooling water). This exchange of heat is crucial in various processes, from heating buildings to cooling machinery and even generating electricity.
The Challenges of Heat Exchanger Fouling
- Scale Formation: When hard minerals in water, such as calcium and magnesium, precipitate onto heat exchanger surfaces, they form scale deposits. Scale acts as an insulating barrier, reducing heat transfer efficiency and causing energy wastage.
- Corrosion: Heat exchangers are often exposed to corrosive environments, especially in industrial settings. Corrosion can weaken the structure, leading to leaks and decreased performance.
- Fouling: Organic materials, debris, and particulates can accumulate on heat exchanger surfaces. This fouling reduces heat transfer rates and increases pressure drop, ultimately reducing system efficiency.
- Biofouling: In water-based heat exchangers, microorganisms can colonize surfaces, forming biofilms that further impede heat transfer and contribute to corrosion.
The Importance of Heat Exchanger Cleaning
- Maintaining Efficiency: Clean heat exchangers are more efficient. Removing deposits, scale, and fouling allows heat to transfer more effectively, reducing energy consumption and operating costs.
- Extending Lifespan: Regular cleaning and maintenance can significantly extend the lifespan of heat exchangers. Preventing corrosion and damage from fouling ensures longevity.
- Conserving Energy: Clean heat exchangers require less energy to achieve the same temperature differentials, contributing to overall energy conservation and sustainability.
- Preventing Downtime: Scheduled cleaning and maintenance help prevent unexpected breakdowns and costly production interruptions.
Heat Exchanger Cleaning Chemicals
Cleaning a heat exchanger using chemicals involves a step-by-step process to effectively remove scale, deposits, and fouling. Here’s a guide to cleaning a heat exchanger using chemical cleaning agents:
Step 1: Safety Precautions
Before starting any cleaning procedure, ensure you have the necessary safety equipment, including gloves, safety goggles, and appropriate protective clothing. Additionally, review the Material Safety Data Sheet (MSDS) for the cleaning chemicals you plan to use to understand their potential hazards and safety requirements.
Step 2: Shutdown and Isolation
For safety reasons, shut down the heat exchanger and isolate it from the rest of the system. This prevents any accidental fluid flow during cleaning.
Step 3: Drain the System
Carefully drain the fluid from both the hot and cold sides of the heat exchanger. Ensure that all fluids are completely drained to avoid contamination with the cleaning chemicals.
Step 4: Visual Inspection
Perform a visual inspection of the heat exchanger’s internals to assess the extent of fouling, deposits, and scaling. This will help determine the appropriate cleaning method and chemical solution required, Heat Exchanger Cleaning.
Step 5: Choose the Cleaning Chemicals
Select the appropriate chemical cleaning agents based on the type of fouling and deposits present in the heat exchanger. Common cleaning agents include:
- Acid-based cleaners for removing scale and mineral deposits.
- Alkaline cleaners for organic fouling.
- Specialty cleaners for specific applications or materials.
Ensure that the chosen chemicals are compatible with the heat exchanger materials and follow the manufacturer’s recommendations for dilution and application.
Step 6: Prepare the Cleaning Solution
Follow the manufacturer’s instructions to prepare the cleaning solution. This typically involves diluting the chemical with water to the recommended concentration. Use caution when handling chemicals, and always add chemicals to water (not the other way around) to avoid splashing or chemical reactions.
Step 7: Circulate the Cleaning Solution
Introduce the cleaning solution into the heat exchanger’s tubes or channels. Depending on the size and design of the heat exchanger, you can use various methods to circulate the solution:
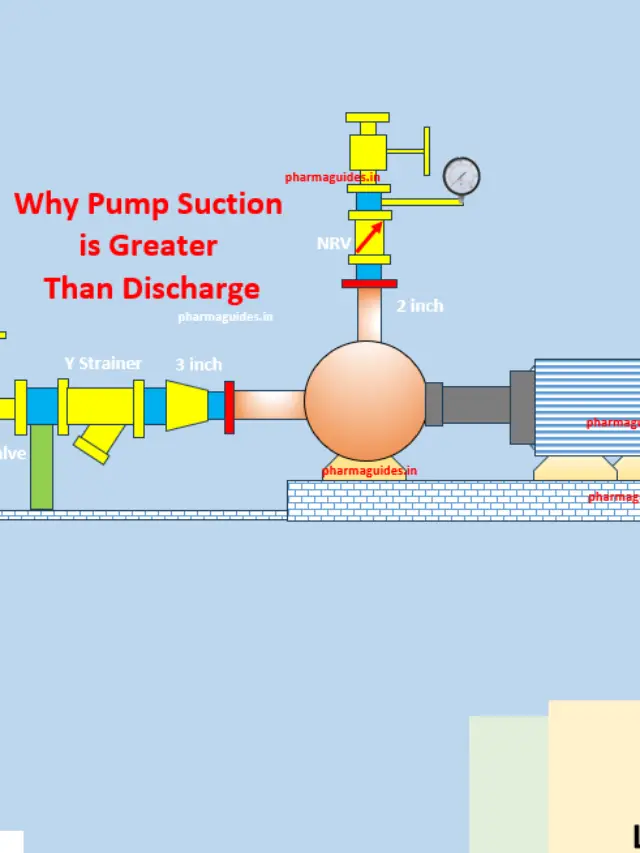
- Pump circulation: Use a pump to circulate the cleaning solution through the heat exchanger.
- Immersion: Submerge smaller heat exchangers in a container filled with the cleaning solution.
- Recirculation: Continuously recirculate the solution through the heat exchanger for the required contact time.
Step 8: Contact Time
Allow the cleaning solution to remain in contact with the fouled surfaces for the recommended time, as specified by the chemical manufacturer. This contact time is essential for effective removal of deposits and fouling.
Step 9: Agitation (if necessary)
In some cases, gentle mechanical agitation may be required to help dislodge stubborn deposits. Ensure that the agitation method is safe for the heat exchanger’s materials.
Step 10: Rinse and Neutralize
After the specified contact time, thoroughly rinse the heat exchanger with clean water to remove any residual cleaning chemicals. Additionally, neutralize the pH of the system if you used acidic or alkaline cleaning agents to bring it back to a safe range.
Step 11: Inspection and Reassembly
Once the heat exchanger is cleaned and rinsed, inspect its internals again to ensure that all fouling and deposits have been effectively removed. If satisfied, reassemble the heat exchanger and prepare it for operation.
Step 12: Resume Operation
Reintegrate the heat exchanger into your system and restart operations, ensuring that it functions efficiently and effectively following the cleaning procedure.
Regular maintenance and cleaning using chemical agents can significantly extend the lifespan and maintain the performance of heat exchangers, preventing issues such as reduced efficiency and costly downtime. Always follow safety guidelines and manufacturer recommendations when working with chemicals and heat exchangers.
How to Prepare for Heat Exchanger Cleaning
Preparing for heat exchanger cleaning is a crucial step to ensure the process is safe, efficient, and effective. Here’s a step-by-step guide on how to prepare for heat exchanger cleaning:
1. Gather Necessary Information:
Before starting the preparation, gather essential information about the heat exchanger, including:
- Type and size of the heat exchanger
- Material of construction (e.g., stainless steel, copper, aluminum)
- Type of fouling or deposits present (scale, corrosion, organic fouling)
- Operating temperature and pressure conditions
- Previous cleaning and maintenance history
- Any specific manufacturer recommendations or guidelines
2. Safety Precautions:
Safety should be your top priority when preparing for heat exchanger cleaning. Ensure you have the following safety measures in place:
- Personal protective equipment (PPE): Gloves, safety goggles, protective clothing, and respiratory protection if necessary.
- Adequate ventilation: Ensure the area is well-ventilated to prevent the buildup of fumes or vapors from cleaning chemicals.
- Safety training: Ensure that the personnel involved in the cleaning process are properly trained in handling chemicals and equipment safely.
- Emergency response: Have a plan in place for responding to potential emergencies, including chemical spills or accidents.
3. Isolation and Shutdown:
To safely clean the heat exchanger, it must be isolated and shut down. Follow these steps:
- Close and lock all isolation valves to prevent fluid flow through the heat exchanger.
- Shut down any associated equipment or systems connected to the heat exchanger.
- Tag and label the equipment to indicate that it is under maintenance and should not be operated.
4. Drain the System:
Completely drain all fluids from both the hot and cold sides of the heat exchanger. Ensure that there is no residual fluid left inside the exchanger, as this can contaminate the cleaning solution and hinder the cleaning process.
5. Visual Inspection:
Conduct a thorough visual inspection of the heat exchanger’s internals. This inspection will help you assess the extent of fouling, deposits, corrosion, or any other issues that may need attention during cleaning.
6. Choose Cleaning Method and Chemicals:
Based on the inspection findings, select the appropriate cleaning method and chemical cleaning agents. Consider the type of fouling, heat exchanger material, and the manufacturer’s recommendations when choosing cleaning chemicals.
7. Assemble Necessary Equipment:
Ensure that you have all the equipment and tools required for the cleaning process, including:
- Pump or circulation system for the cleaning solution
- Hose connections and fittings
- Safety equipment (PPE)
- Brushes, scrapers, or other mechanical cleaning tools
- Neutralizing agents (if required)
- Water supply for rinsing
8. Review Procedures:
Review the specific cleaning procedures and guidelines provided by the chemical manufacturer and follow them closely. Ensure that all personnel involved are familiar with the cleaning process and safety precautions.
9. Plan for Disposal:
Consider how you will dispose of used cleaning solutions, rinsing water, and any waste materials generated during the cleaning process. Follow local regulations and environmental guidelines for proper disposal.
10. Notify Relevant Parties:
Inform relevant personnel, including maintenance teams and operators, about the upcoming heat exchanger cleaning. Ensure that everyone is aware of the shutdown and maintenance schedule.
11. Document the Process:
Maintain detailed records of the cleaning process, including the chemicals used, contact times, and any issues encountered. Proper documentation helps in tracking maintenance history and troubleshooting.
By following these steps to prepare for heat exchanger cleaning, you can ensure a safe and effective cleaning process that maintains the efficiency and longevity of your heat exchanger while minimizing risks to personnel and the environment.
heat exchanger cleaning methods
- Mechanical Cleaning: This involves physically removing deposits and fouling using tools like brushes, scrapers, or high-pressure water jets. Mechanical cleaning is effective for relatively soft fouling.
- Chemical Cleaning: Chemical solutions are used to dissolve scale and deposits. Acid-based or alkaline cleaning agents are tailored to the specific fouling material. Care must be taken to ensure safety and environmental compliance.
- Steam Cleaning: In some cases, high-temperature steam is used to loosen and remove deposits. This method can be effective for organic fouling.
- Ultrasonic Cleaning: Ultrasonic waves create microscopic bubbles that collapse near the surface, helping to dislodge deposits and fouling.
- Thermal Cleaning: Applying high temperatures can burn off organic fouling, but it may not be suitable for all heat exchanger materials, Heat Exchanger Cleaning.
Maintenance Practices
- Regular Inspection: Routine visual inspections can identify early signs of fouling, corrosion, or other issues. Heat Exchanger Cleaning.
- Cleaning Schedule: Establish a cleaning schedule based on the specific heat exchanger’s operating conditions and the nature of the fluids it handles.
- Monitoring: Implement monitoring systems to track heat exchanger performance, flow rates, and temperature differentials.
How to Clean a Heat Exchanger ?
To clean a heat exchanger, follow these steps:
- Isolate and shut down the heat exchanger.
- Drain fluids from both sides.
- Inspect for fouling or deposits.
- Choose appropriate cleaning method and chemicals.
- Apply cleaning solution.
- Allow contact time.
- Rinse thoroughly.
- Reassemble, restart, and monitor for efficiency.
What is the best way to clean a heat exchanger?
- The best way to clean a heat exchanger depends on the type of fouling or deposits present. Mechanical cleaning with brushes or high-pressure water jets, chemical cleaning with suitable agents, and thermal cleaning are common methods. The choice should be based on the specific fouling and the heat exchanger’s material.

Which chemical is used for heat exchanger cleaning?
- The chemical used for heat exchanger cleaning depends on the type of fouling. Acid-based cleaners are used for scale removal, alkaline cleaners for organic fouling, and specialty cleaners for specific applications. The choice of chemical should align with the fouling type and the heat exchanger material.
Why is cleaning required in a heat exchanger?
- Cleaning is required in a heat exchanger to maintain its efficiency and prevent issues like reduced heat transfer, increased energy consumption, and potential equipment damage. Deposits, scale, and fouling can accumulate over time, hindering heat exchange and overall performance.
How do you clean an exchanger?
- To clean a heat exchanger, follow these steps:
a. Isolate and shut down the exchanger.
b. Drain fluids from both sides.
c. Inspect for fouling or deposits.
d. Choose the appropriate cleaning method and chemicals.
e. Apply the cleaning solution and allow for the recommended contact time.
f. Rinse thoroughly, Heat Exchanger Cleaning.
g. Reassemble, restart, and monitor for efficiency.
Conclusion
Heat exchangers are essential components in various industries, and their efficient operation is critical for energy savings and system reliability. Regular heat exchanger cleaning and maintenance are essential practices to ensure optimal performance, extend the lifespan of these devices, and reduce operating costs. With the right cleaning methods and a proactive approach to maintenance, heat exchangers can continue to play a vital role in facilitating heat transfer processes across a wide range of applications.
heat exchanger chemical cleaning procedure pdf
shell and tube heat exchanger cleaning methods


